Post by labrador on Aug 21, 2010 17:30:28 GMT 8
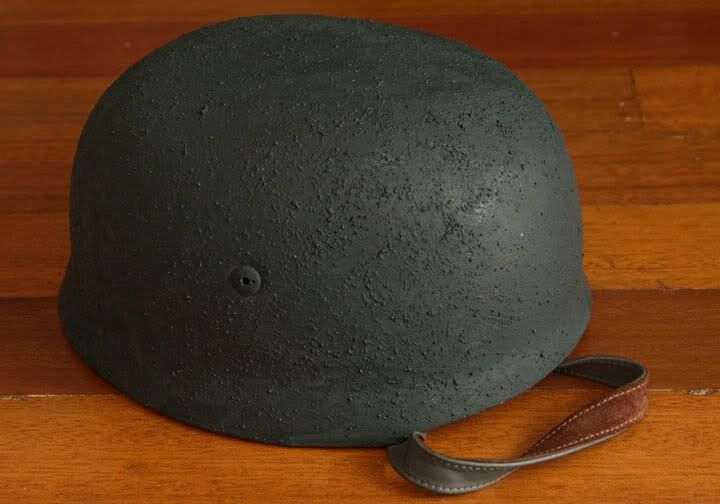
I've always wanted to do an FJ loadout and for me, even more than the bonesack smock, the signature piece of equipment of the fallschirmjager was the M38 helmet. After trolling the internet for an affordable one, I got word that Jim was buying one and so i decided to order one as well from AGC shop. I must say It felt weird on my head after months of wearing a lightweight fiberglass German helmet from Jojo but i guess i'll just have to get used to it. The helmet arrived in a light primer grey color like this:
cgi.ebay.com/WWII-GERMAN-FALLSCHIRMJAGER-M38-HELMET-5202-/300448623068?pt=LH_DefaultDomain_0#ht_5391wt_881
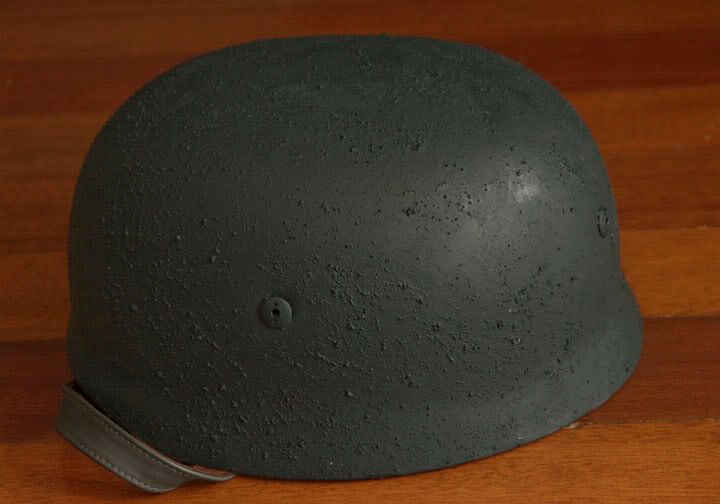
I decided to do it up in a battle worn roughened finish with a sand roughened feld blau paint coat. So i mixed up a slurry of white glue, acrylic texture paste (not needed IMHO), fine sand and Tamiya field blue. After mixing the mixture up to the consistency of a cement slurry, I added some Tamiya sea Blue to darken the mixture. This I hand painted with a broad brush on to the Helmet. I don't know if it was the primer or the white glue, but the mixture adhered very well to the grey shell. After the first coat dried leaving a lot of grey showing through the paint, i rubbed some of the excess sand off then proceeded with another two coats of the field blue and sea blue mixture taking care to dab out the bare spots. The result was this:
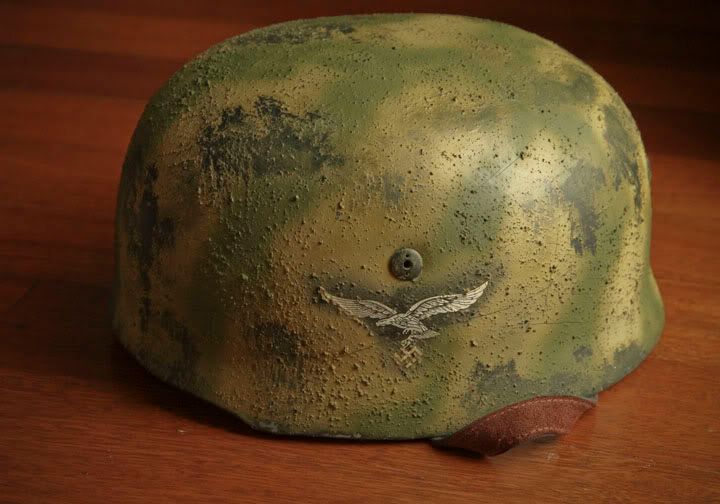
I left the helmet to dry in the sun for an afternoon while i overturned my modelling supplies for the sheets of helmet decals Franz Lopez and I had printed around 20 years ago (!!!!!!) and found a few sheets. I asprayed the area where the decals were to be applied with glosscoat and after drying applied the decals and gave them a generous coat of Gunze Mr. Mark Softer. (gotta love that name). The decals settled into the rough paint snugly and so after they dried I sprayed the entire helmet with Gunze laquer gloss to seal everything.
I was intending to use the hair spray trick for the paint but my can of hair spray went pfft on me...no more propellant. But let me explain briefly how it's done.
The Hair Spray creates a slow drying layer upon which your standard camouflage is sprayed. When the camou layer is complete the hairspray below it has not yet dried and so you can rub areas of the paint job off with warm water or acrylic thinner and a rough brush.
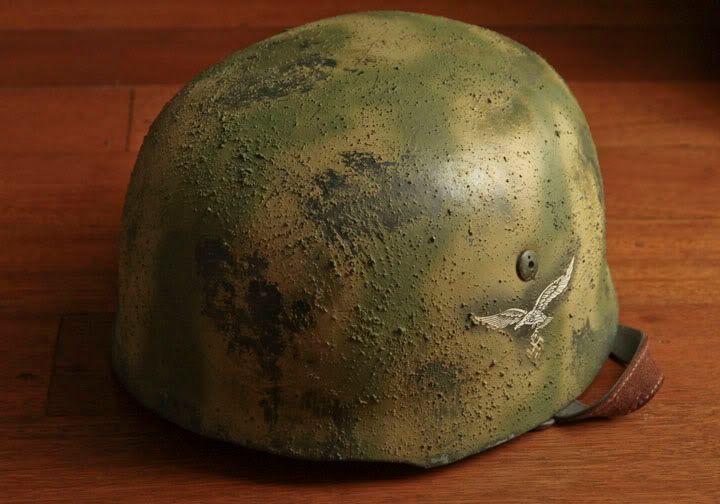
So without hairspray, i decided to use semi permanent krylon dulling spray. This leaves a waxy matt surface on the helmet that is easily wiped off. I then sprayed a two tone scheme using lightened tamiya dark yellow and tamiya flat green mixed with dark yellow to create that unique german camouflage pea green in wavy bands using pics as a reference. When the paint layer was slightly dry I wet an old brush with tamiya acrylic thinner and stabbed the thinner into the paint. after repeatedly stabbing the brush onto the finish you will see that the top layer of paint comes off while some of it blends into the background color creating a chipped faded paint scheme. Make sure to chip and fade high wear areas like the helmet brin, attachment points and helmet top. For the next step, i rubbed the helmet all over with a rough rag so more of the paint came off and the smooth parts became semi gloss. Lastly I took a chisel and randomly ran it all over the helmet creating a lot of scratch marks. The dulling spray scratches far more easily than hairspray so it will continue to weather quickly with use. Hope this helps!
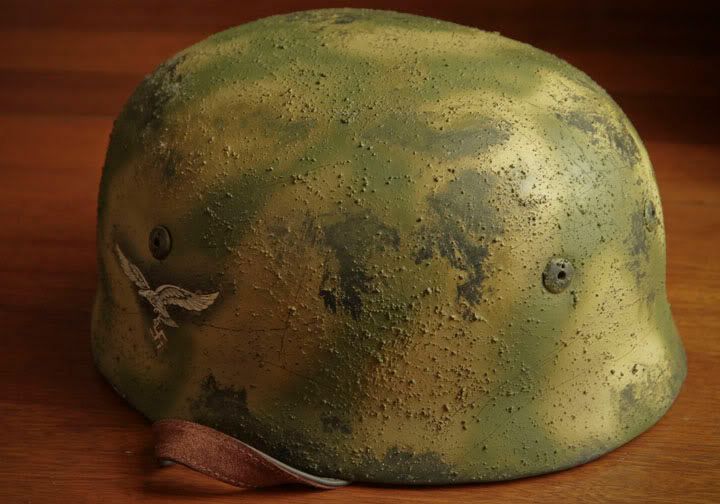

All in all a fun weekend project. We have yet to see how durable the paint is with the dulling spray beneath so stay tuned for updates.
cgi.ebay.com/WWII-GERMAN-FALLSCHIRMJAGER-M38-HELMET-5202-/300448623068?pt=LH_DefaultDomain_0#ht_5391wt_881
I decided to do it up in a battle worn roughened finish with a sand roughened feld blau paint coat. So i mixed up a slurry of white glue, acrylic texture paste (not needed IMHO), fine sand and Tamiya field blue. After mixing the mixture up to the consistency of a cement slurry, I added some Tamiya sea Blue to darken the mixture. This I hand painted with a broad brush on to the Helmet. I don't know if it was the primer or the white glue, but the mixture adhered very well to the grey shell. After the first coat dried leaving a lot of grey showing through the paint, i rubbed some of the excess sand off then proceeded with another two coats of the field blue and sea blue mixture taking care to dab out the bare spots. The result was this:
I left the helmet to dry in the sun for an afternoon while i overturned my modelling supplies for the sheets of helmet decals Franz Lopez and I had printed around 20 years ago (!!!!!!) and found a few sheets. I asprayed the area where the decals were to be applied with glosscoat and after drying applied the decals and gave them a generous coat of Gunze Mr. Mark Softer. (gotta love that name). The decals settled into the rough paint snugly and so after they dried I sprayed the entire helmet with Gunze laquer gloss to seal everything.
I was intending to use the hair spray trick for the paint but my can of hair spray went pfft on me...no more propellant. But let me explain briefly how it's done.
The Hair Spray creates a slow drying layer upon which your standard camouflage is sprayed. When the camou layer is complete the hairspray below it has not yet dried and so you can rub areas of the paint job off with warm water or acrylic thinner and a rough brush.
So without hairspray, i decided to use semi permanent krylon dulling spray. This leaves a waxy matt surface on the helmet that is easily wiped off. I then sprayed a two tone scheme using lightened tamiya dark yellow and tamiya flat green mixed with dark yellow to create that unique german camouflage pea green in wavy bands using pics as a reference. When the paint layer was slightly dry I wet an old brush with tamiya acrylic thinner and stabbed the thinner into the paint. after repeatedly stabbing the brush onto the finish you will see that the top layer of paint comes off while some of it blends into the background color creating a chipped faded paint scheme. Make sure to chip and fade high wear areas like the helmet brin, attachment points and helmet top. For the next step, i rubbed the helmet all over with a rough rag so more of the paint came off and the smooth parts became semi gloss. Lastly I took a chisel and randomly ran it all over the helmet creating a lot of scratch marks. The dulling spray scratches far more easily than hairspray so it will continue to weather quickly with use. Hope this helps!
All in all a fun weekend project. We have yet to see how durable the paint is with the dulling spray beneath so stay tuned for updates.