|
|
Post by jnmodeller on Apr 13, 2010 15:52:34 GMT 8
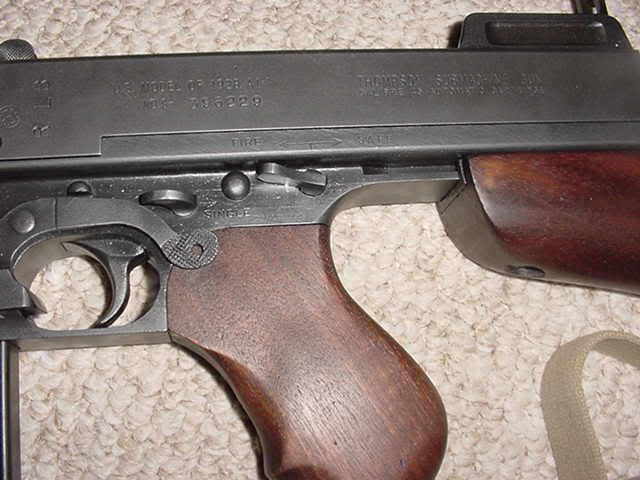
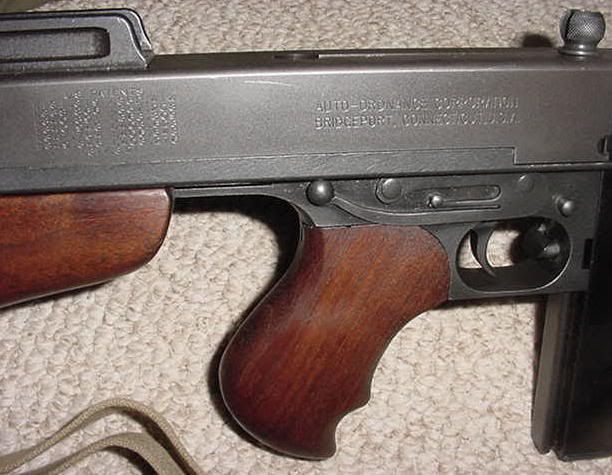
Here's a How to Do, Making the right 1928 Thompson, this is an early type the charging handle must be on the top of the receiver. the manufacturer used the same cast of the late version that has the charging handle on the side. The M1928A1 variant entered mass production before the attack on Pearl Harbor, as on-hand stocks ran out. Changes included a horizontal forend, in place of the distinctive vertical foregrip ("pistol grip"), and a provision for a military sling. So the pistol grip also did see action when the Japs invaded the Philippines.The horizontal forend is more on the military issue. the fastest and easy way is to bring to a machine shop but if you have the skills you may try it your self. here's some tips on how i did it. 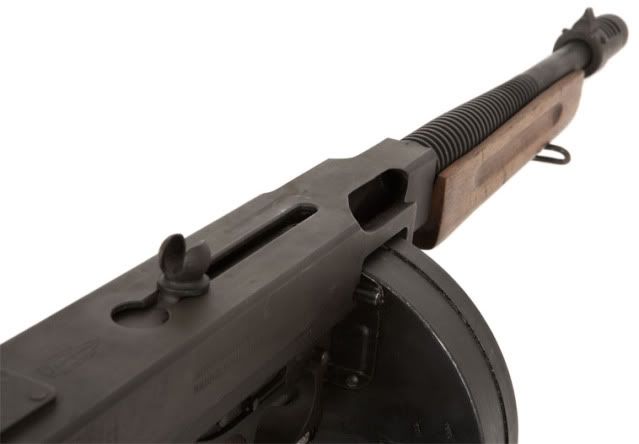 First have a reference to guide you 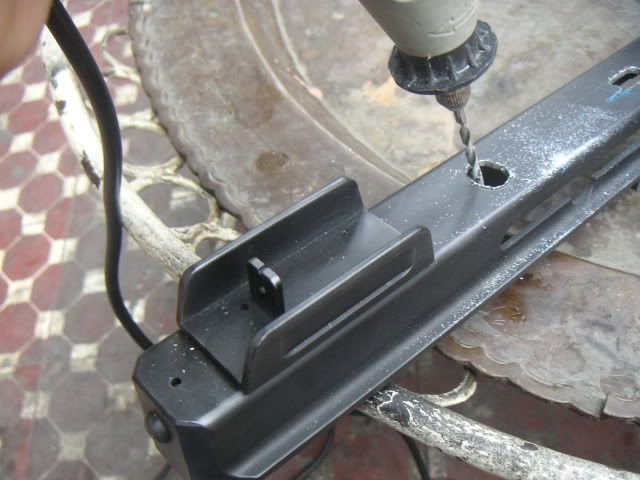 transfer the side slot exactly with the same measurements on the top portion of the receiver but having a rounded end with the same circumference of the charging handle. mark it with pencil. Drill both ends, you can mike a wider hole by filling your drill sideways when its still on 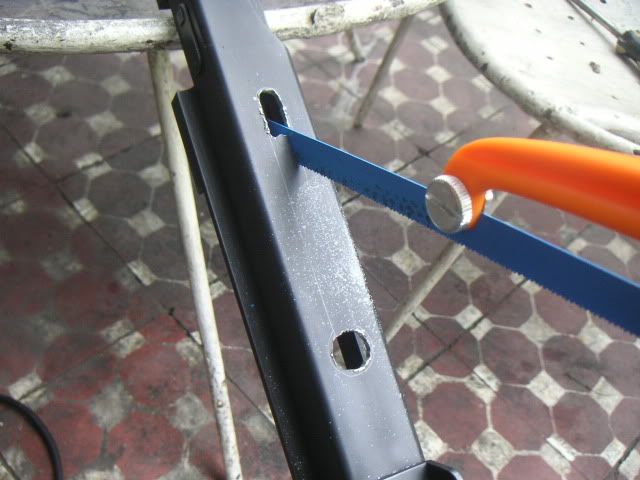 use a steel saw to cut the sides 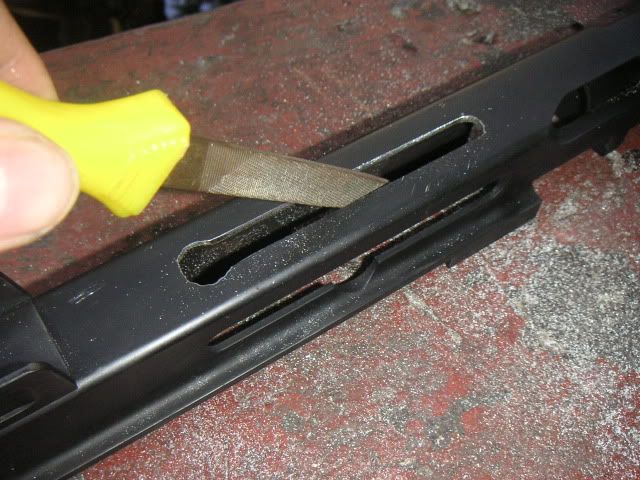 then use a file to make the sides smoother and a #600 too #1000 for the final finish 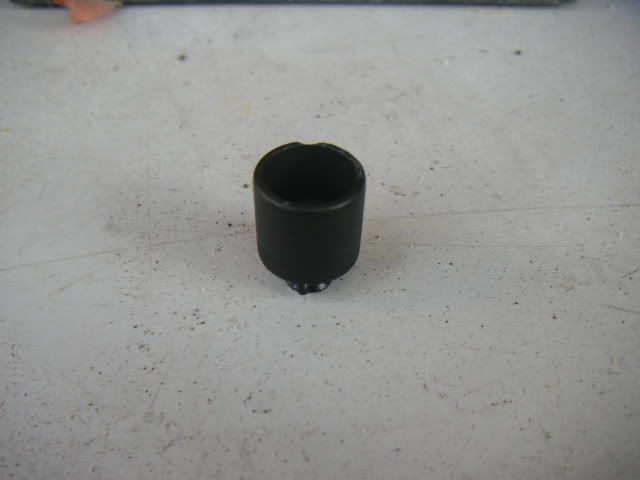 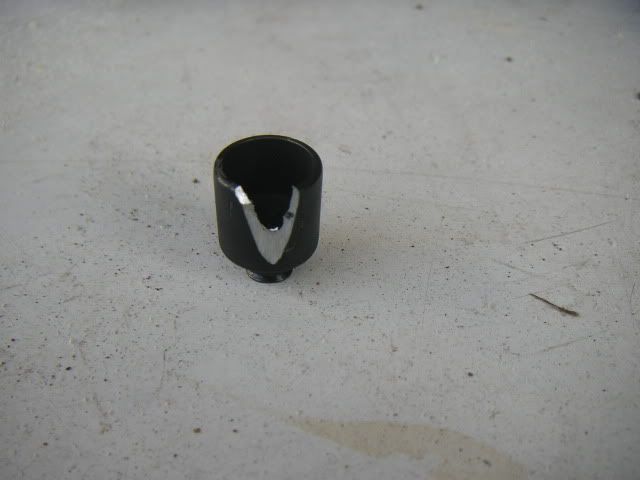 modify the charging handle, mark a U on both sides that is to make the front site visible, then grind with dremel 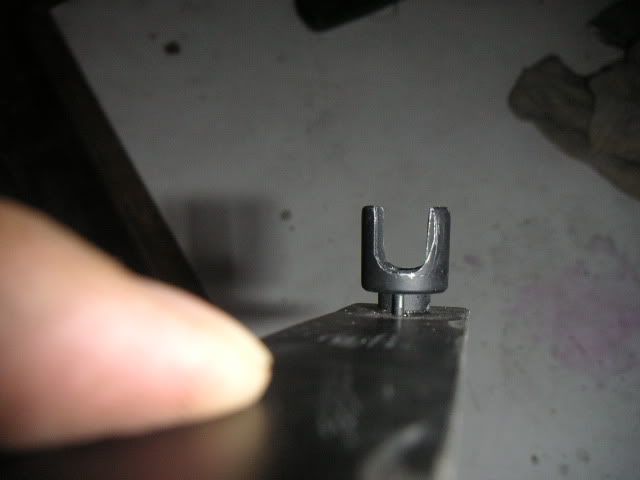 next is to make it bulge or round by using a milliput ( a clay like that gets hard when mix together) to be continued..... |
|
jimmiroquai
WW2AAA Board Chairman  Walking the endless steppes...
Posts: 1,326
|
Post by jimmiroquai on Apr 13, 2010 20:42:25 GMT 8
Nice, tutorial! I wanted an M1A1 but couldn't find one anymore. So i bought the Cyma M1928, and built my own front handguard out of sintra. I still have to modify the reciever like you did. Or just trade my stock one in for one of Vaz's custom jobs. (Sawing metal always tires my hands out and they shake a lot when i do surgery when they are) 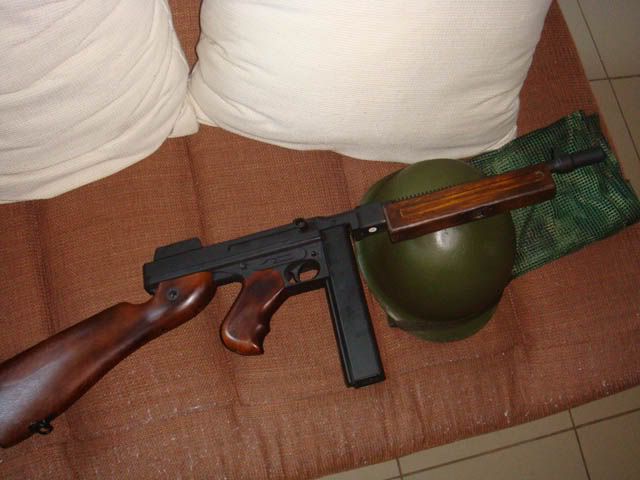 Hope you continue this tutorial! |
|
|
|
Post by jnmodeller on Apr 13, 2010 21:10:04 GMT 8
That's a neat hand guard, i got mine from my old marui thompson. i did this last holy week after i went to vals place , was inspired on his conversion, yes try to trade yours its the easiest way val did a good job on it.
|
|
kalbs
Administrator
ADMIN
Hair is over rated
Posts: 940
|
Post by kalbs on Apr 13, 2010 21:58:54 GMT 8
Guys, where did you find the CYMA base model? I've never seen it here in HK.
This is a very nice project JN
|
|
jimmiroquai
WW2AAA Board Chairman
Walking the endless steppes...
Posts: 1,326
|
Post by jimmiroquai on Apr 13, 2010 22:17:21 GMT 8
@kalbs - really? It was released all over June last year, if i remember correctly.
|
|
kalbs
Administrator
ADMIN
Hair is over rated
Posts: 940
|
Post by kalbs on Apr 13, 2010 22:23:15 GMT 8
Ya, never seen it here Jimmi. The only tommy left here is the TM version. All the CYMA's are gone but they were the M1A1's.
|
|
|
|
Post by indiosbravos on May 8, 2010 22:59:37 GMT 8
Any update sir? I'm really impressed by the ingenuity of all members in this forum. I'm proud of you guys.....
|
|
|
|
Post by jnmodeller on May 10, 2010 11:43:16 GMT 8
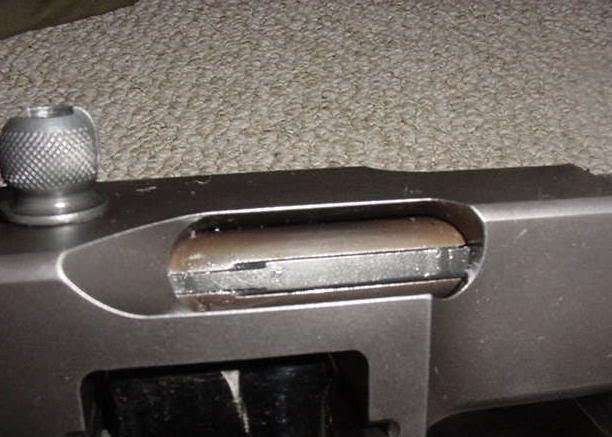
continuation.... 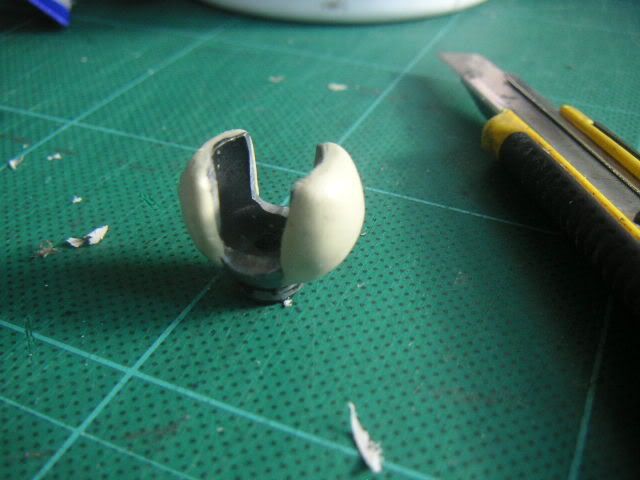 heres how it looks with clay/miliputt, wet your fingers when shaping it, to avoid sticking 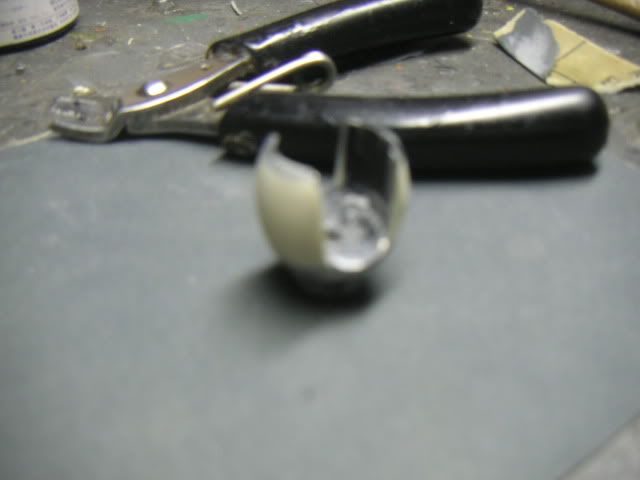 i let it stay overnight, before sanding 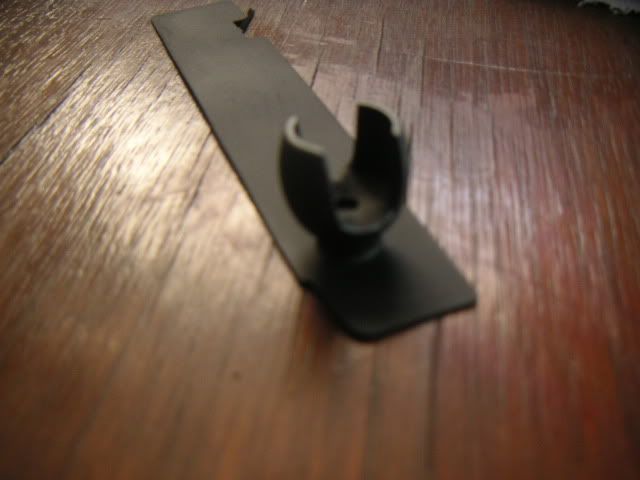 screw it on its support plate then paint it, i used Bosny aerosol Flat black |
|
|
|
Post by jnmodeller on May 10, 2010 11:59:34 GMT 8
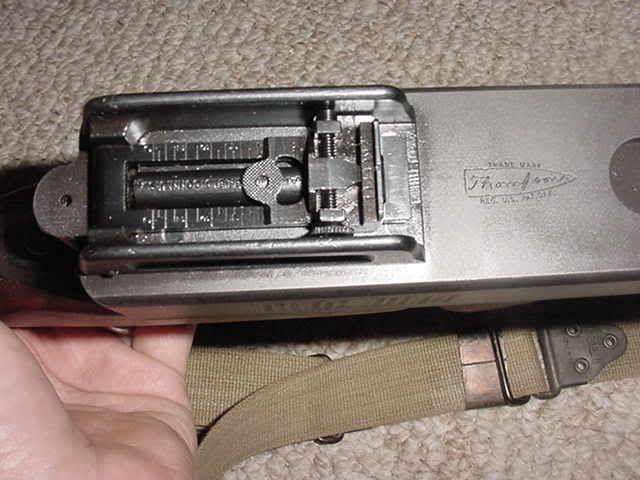
now to cover the old slot, i used a PVC sheet if you cant find one the alter native is to put a plastic card/sheet (from a no smoking signage) paste it inside the the receiver and from the out side fill it up with miliputt or any epoxy will do it then sand until it levels then paint it with Flat black and some weathering. 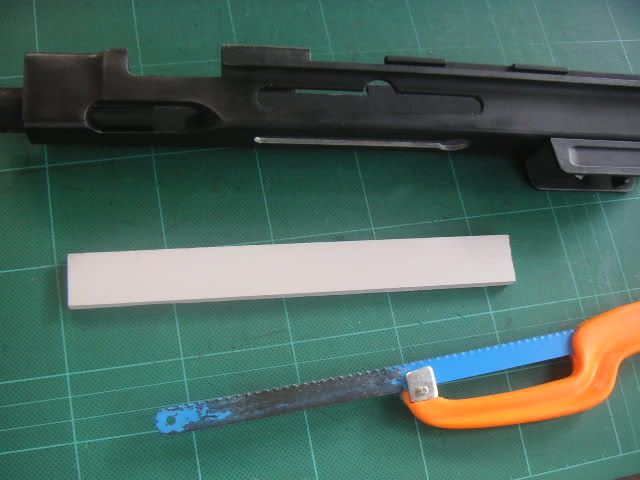 trace it on the old slot to reshape 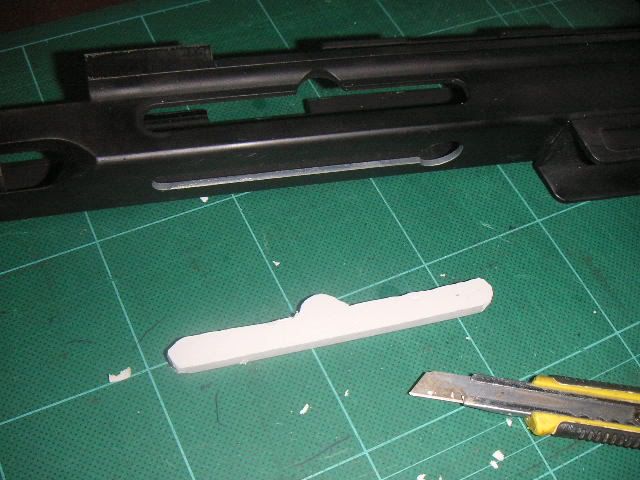 use a dremel to shape it 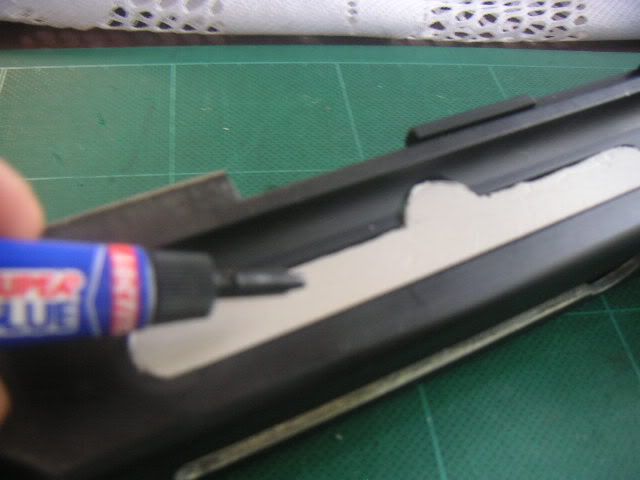 fill the gap on the sides with any superglue 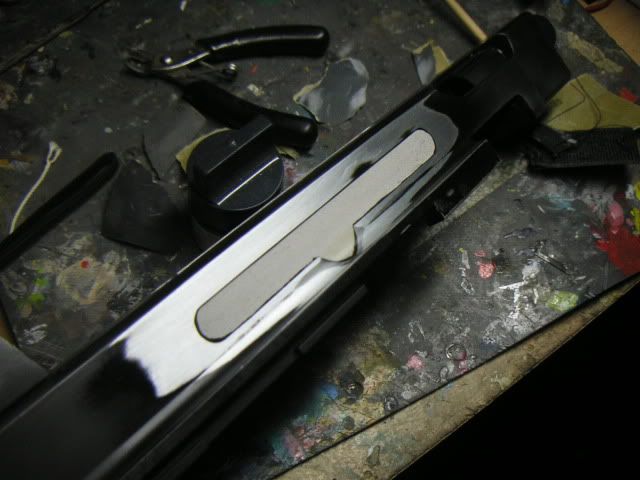 sand the surface to level it, then spay it with flatblack 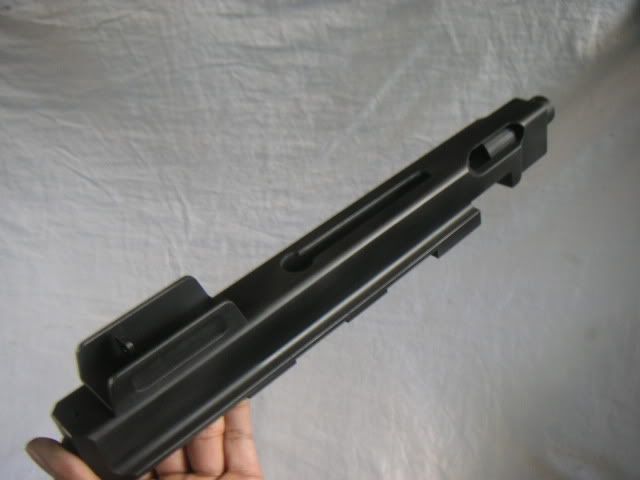 Hope it helps |
|
kalbs
Administrator
ADMIN
Hair is over rated
Posts: 940
|
Post by kalbs on May 10, 2010 12:09:10 GMT 8
JN,
The top reciever is actually thicker than the M1A1, you could cover it using a steel plate about the thickness of the bottom flair (4mm ish) on both sides and blend the seam with putty. look closely at the very first picture you posted above
|
|
|
|
Post by jnmodeller on May 10, 2010 13:01:01 GMT 8
JN, The top reciever is actually thicker than the M1A1, you could cover it using a steel plate about the thickness of the bottom flair (4mm ish) on both sides and blend the seam with putty. look closely at the very first picture you posted above kalbs , yes your right, it is thicker... umm i mis that. |
|
kalbs
Administrator
ADMIN
Hair is over rated
Posts: 940
|
Post by kalbs on May 10, 2010 19:47:49 GMT 8
|
|
otacon14th
Feldwebel
 war does not make men great, but sometimes, war brings out the greatness in men
Posts: 207
|
Post by otacon14th on May 10, 2010 21:34:15 GMT 8
i've seen someone on the old acmboard who convert his M1A1 to M1928 and uses a wood plank and putty to widen his receiver body.
I think its better to use thick PVC sheet rather than 4mm or thicker metal bar which will add more weight to the gun itself or, another option is use a Aluminum bar lighter than metal.
also fire-selector knob and safe- selector knob are also different to M1A1
|
|
kalbs
Administrator
ADMIN
Hair is over rated
Posts: 940
|
Post by kalbs on May 10, 2010 22:35:21 GMT 8
Aluminium plate would work but it doesn't hold paint well, it scratches easily. I'd stay clear of wood because it will shrink and crack and the PVC sheet is a bit soft. I'd stick with iron bar stock, it's easier to work with to me.
|
|